

When to Replace Your Brake Disc Replacement Tool: A Comprehensive Guide for Safety and Performance
Aug 17,2026
When to Replace Your Brake Disc Replacement Tool: A Comprehensive Guide
Table of Contents
1. Understanding Brake Discs and Their Importance
2. Signs of Worn Brake Discs
3. The Role of Brake Disc Replacement Tools
4. When to Replace Your Brake Disc Replacement Tool
5. Choosing the Right Brake Disc Replacement Tool
6. Step-by-Step Brake Disc Replacement Guide
7. Maintena
When to Replace Your Brake Disc Replacement Tool: A Comprehensive Guide
Table of Contents
- 1. Understanding Brake Discs and Their Importance
- 2. Signs of Worn Brake Discs
- 3. The Role of Brake Disc Replacement Tools
- 4. When to Replace Your Brake Disc Replacement Tool
- 5. Choosing the Right Brake Disc Replacement Tool
- 6. Step-by-Step Brake Disc Replacement Guide
- 7. Maintenance Tips for Brake Disc Replacement Tools
- 8. Conclusion
- 9. Frequently Asked Questions
1. Understanding Brake Discs and Their Importance
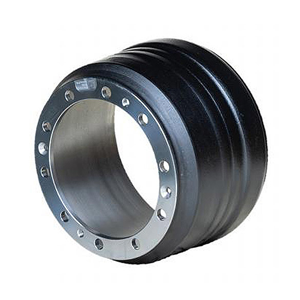
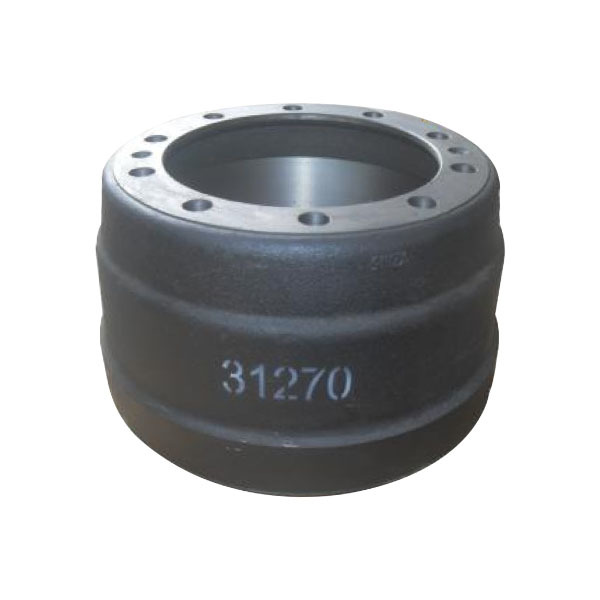
Brake discs are critical components of a vehicle's braking system, providing the necessary friction required to slow down or stop the vehicle effectively. They are typically made of cast iron or composite materials and are designed to withstand high temperatures and pressures.
As your vehicle’s wheels turn, brake pads clamp onto the brake discs, generating friction that creates the stopping power needed for safe driving. Understanding the workings of brake discs is essential for maintaining vehicle safety and ensuring optimal performance. Regular inspection and timely replacement can prevent brake failure, ensuring that you and your passengers remain safe on the road.
2. Signs of Worn Brake Discs
It is imperative to be aware of the signs indicating that your brake discs may be worn or damaged. Recognizing these symptoms early can save you both time and money by preventing further damage to your braking system. Here are the most common signs to look out for:
Unusual Noises
If you hear squeaking, grinding, or thumping noises when applying the brakes, it may be time to inspect your brake discs. Squeaking can indicate that the brake pads are worn down, while grinding typically means the pads have worn through, causing metal-on-metal contact.
Vibration or Pulsation
Experiencing vibrations in the brake pedal or steering wheel when braking can signal warped brake discs. Warping usually occurs due to overheating or improper installation, and can drastically affect braking efficiency.
Reduced Braking Performance
If you notice that your vehicle takes longer to stop or the brakes feel less responsive, it might indicate worn brake discs. Reduced braking performance compromises safety and should be addressed immediately.
Visual Inspection
A simple visual inspection can reveal a lot about the state of your brake discs. Look for cracks, deep grooves, or discoloration caused by overheating. If you notice any irregularities, it’s time to replace the discs.
3. The Role of Brake Disc Replacement Tools
Having the right brake disc replacement tools is crucial for both DIY mechanics and professional technicians. These tools facilitate the safe removal and installation of brake discs, ensuring that the job is done efficiently and correctly.
Types of Brake Disc Replacement Tools
Several tools can aid in the replacement of brake discs, including:
- **Brake Disc Pullers**: Designed to extract the brake disc from the hub, these pullers ensure minimal damage to the surrounding components.
- **Torque Wrenches**: Essential for applying the correct amount of torque to bolts, preventing over-tightening or under-tightening.
- **Brake Pad Compressors**: Useful for compressing the brake caliper when installing new brake pads along with the discs.
Using high-quality tools not only makes the job easier but also ensures that the brakes will function correctly after installation.
4. When to Replace Your Brake Disc Replacement Tool
Just as brake discs require replacement, so do the tools used to replace them. Wear and tear on tools can lead to ineffective repairs and even create safety hazards. Here are the signs that indicate it’s time to replace your brake disc replacement tools:
Visible Damage or Wear
If you notice cracks, rust, or significant wear on your tools, this damage can impede their performance and should be addressed immediately.
Frequent Malfunction
Tools that frequently malfunction, such as slipping wrenches or ineffective pullers, can lead to unsafe conditions while working on your brakes.
Outdated Technology
As automotive technology advances, so do the tools used for repairs. If your tools are outdated and not designed for modern brake systems, consider investing in new equipment to ensure optimal performance.
5. Choosing the Right Brake Disc Replacement Tool
Selecting the appropriate brake disc replacement tool is vital for successful brake service. Here are key features to consider:
Compatibility
Ensure that the tools you choose are compatible with your vehicle's make and model. Some brake systems may require specialized tools for effective service.
Durability
Invest in high-quality tools made from durable materials. While they may cost more upfront, they will last longer and provide better performance.
Ease of Use
Select tools that are user-friendly and ergonomic. Tools designed for comfort and ease of use can significantly reduce the time and effort needed for brake disc replacement.
Brand Reputation
Research reputable brands known for producing reliable automotive tools. Reading reviews and seeking recommendations can guide you in making the right choice.
6. Step-by-Step Brake Disc Replacement Guide
Replacing brake discs can be a straightforward task if you follow a systematic approach. Here’s a detailed guide to help you through the process:
Step 1: Prepare Your Vehicle
- Park your vehicle on a flat surface and engage the parking brake.
- Loosen the lug nuts on the wheel you will be working on but do not remove them yet.
Step 2: Lift the Vehicle
- Use a hydraulic jack to lift the vehicle and secure it with jack stands for safety.
Step 3: Remove the Wheel
- Completely remove the lug nuts and take the wheel off to access the brake components.
Step 4: Remove the Brake Caliper
- Use appropriate tools to detach the brake caliper from its mounting bracket and suspend it using a bungee cord to avoid straining the brake line.
Step 5: Remove the Old Brake Disc
- If your brake disc has retaining screws, remove them. Using a brake disc puller, carefully extract the old brake disc from the hub.
Step 6: Install the New Brake Disc
- Position the new brake disc onto the hub, ensuring it fits snugly. If necessary, reinsert retaining screws.
Step 7: Reattach the Brake Caliper
- Carefully reposition the caliper over the new brake disc and secure it using the original bolts.
Step 8: Reinstall the Wheel
- Replace the wheel and hand-tighten the lug nuts before lowering the vehicle back to the ground.
Step 9: Final Checks
- Once on the ground, tighten all lug nuts to the manufacturer’s specified torque and check the brake function before driving.
7. Maintenance Tips for Brake Disc Replacement Tools
Proper maintenance of your brake disc replacement tools is essential for longevity and performance. Here are some effective tips:
Cleaning
Regularly clean your tools after each use to remove dirt, grease, and debris. This helps prevent corrosion and ensures that they are ready for the next use.
Storage
Store tools in a dry, cool place, ideally in a tool chest or organizer. Proper storage minimizes the risk of damage and keeps your tools organized.
Periodic Inspection
Schedule regular inspections of your tools to check for signs of wear and tear. Address any issues promptly to avoid complications during repairs.
8. Conclusion
Maintaining the integrity of your braking system is paramount for safety on the road, and understanding when to replace your brake disc replacement tool is a crucial part of that process. By recognizing the signs of wear and knowing how to choose and care for your tools, you can ensure that your brake system remains in top condition. Whether you are a seasoned mechanic or a DIY enthusiast, adhering to these guidelines will lead to more effective repairs and a safer driving experience.
9. Frequently Asked Questions
Q1: How often should brake discs be replaced?
A1: Brake discs typically should be replaced every 30,000 to 70,000 miles, depending on driving conditions and vehicle type. Always consult your vehicle's owner manual for specific guidelines.
Q2: What are the risks of not replacing worn brake discs?
A2: Failing to replace worn brake discs can lead to reduced braking performance, increased stopping distances, and potentially dangerous driving conditions.
Q3: Can I replace brake discs without professional help?
A3: Yes, if you have the right tools and knowledge, you can replace brake discs yourself. However, if you are unsure, it's best to seek professional assistance.
Q4: How do I know if my brake discs are warped?
A4: Common signs of warped brake discs include vibration in the brake pedal or steering wheel, as well as unusual noises when braking.
Q5: What should I do with old brake discs?
A5: Old brake discs can often be recycled. Check with local recycling facilities or automotive shops for proper disposal options.
This comprehensive guide will aid in understanding and maintaining your braking system, ensuring safety and performance on the road.


Contact
E-mail:
Phone
Add:
West of Dongwang Village, Gucheng Town, Longyao County, Xingtai City, Hebei Province


Focus On The R&D Of Brake Drums And Wheels