

A Comprehensive Guide to Rear Axle Brake Drum Installation
Jul 13,2026
A Comprehensive Guide to Rear Axle Brake Drum Installation
Table of Contents
Introduction to Rear Axle Brake Drum Installation
The Importance of Proper Brake Drum Installation
Essential Tools for Brake Drum Installation
Preparation Steps Before Starting Installation
Step-by-Step Process for Installing Rear Axle Brake Drums
Common Issues and Troubleshooting Tips
Mainten

A Comprehensive Guide to Rear Axle Brake Drum Installation
Table of Contents
- Introduction to Rear Axle Brake Drum Installation
- The Importance of Proper Brake Drum Installation
- Essential Tools for Brake Drum Installation
- Preparation Steps Before Starting Installation
- Step-by-Step Process for Installing Rear Axle Brake Drums
- Common Issues and Troubleshooting Tips
- Maintenance Tips for Brake Drums
- Conclusion
- FAQs
Introduction to Rear Axle Brake Drum Installation
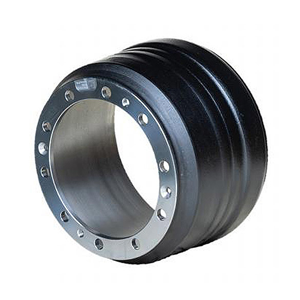
Installing rear axle brake drums is a crucial task for maintaining vehicle safety and performance. Brake drums play a vital role in the braking system, providing the necessary friction to slow down or stop the vehicle. Understanding the installation process not only enhances your mechanical skills but also ensures safe operation of your vehicle. This guide aims to provide comprehensive insights into the installation of rear axle brake drums, including key tips and techniques that will facilitate a successful process.
The Importance of Proper Brake Drum Installation
Correct installation of rear axle brake drums is essential for several reasons:
1. Ensures Vehicle Safety
Improperly installed brake drums can lead to brake failure, resulting in dangerous situations on the road. Ensuring that brake components are correctly placed and secured can significantly reduce the risk of accidents.
2. Enhances Vehicle Performance
Well-installed brake drums contribute to better braking efficiency, ensuring that your vehicle responds promptly when you apply the brakes. This not only enhances performance but also prolongs the lifespan of the brake system.
3. Saves Time and Money
Mistakes in installation can lead to additional repairs and replacements, costing you valuable time and money. By following the proper procedures, you can avoid these potential pitfalls.
Essential Tools for Brake Drum Installation
Before starting the installation process, it's crucial to gather the necessary tools. Here’s a list of tools you will need:
1. Basic Hand Tools
- **Socket Set**: For removing and tightening nuts and bolts.
- **Wrenches**: Both metric and standard sizes may be required.
- **Screwdrivers**: A flathead and a Phillips screwdriver are essential.
2. Specialty Tools
- **Brake Spring Tool**: This tool will help you safely install and remove brake springs.
- **Brake Drum Puller**: Useful for removing stubborn brake drums that may be stuck.
3. Safety Equipment
- **Safety Glasses**: Protect your eyes from debris.
- **Gloves**: Keep your hands safe and clean.
Preparation Steps Before Starting Installation
Preparation is key to a successful installation. Follow these steps to ensure a smooth process:
1. Gather All Necessary Tools and Parts
Make sure you have everything needed before starting. Having all tools and parts on hand will save time and frustration.
2. Ensure a Clean Work Environment
Set up a well-lit, organized workspace. A clean area will help you locate tools quickly and minimize hazards.
3. Review the Vehicle’s Manual
Always consult your vehicle’s manual for specific instructions related to your model. This can provide valuable information about torque specifications and other crucial details.
Step-by-Step Process for Installing Rear Axle Brake Drums
Now, let’s dive into the detailed steps for installing rear axle brake drums:
Step 1: Remove the Wheel
- Loosen the lug nuts with a wrench before lifting the vehicle.
- Use a jack to lift the vehicle securely and place jack stands for safety.
- Fully remove the lug nuts and take off the wheel to expose the brake assembly.
Step 2: Remove the Brake Drum
- If the drum doesn’t come off easily, use a brake drum puller to gently detach it.
- Inspect the drum for wear or damage before proceeding.
Step 3: Inspect the Brake Components
- Check the brake shoes, springs, and hardware for wear.
- Replace any worn components to ensure optimal performance.
Step 4: Install the New Brake Drum
- Slide the new brake drum onto the axle.
- Ensure it fits snugly and rotates freely without obstruction.
Step 5: Reinstall the Brake Shoes and Springs
- Carefully position the brake shoes and reattach the springs using a brake spring tool.
- Make sure everything is securely fastened and aligned properly.
Step 6: Replace the Wheel
- Place the wheel back onto the hub and hand-tighten the lug nuts.
- Lower the vehicle and then use a torque wrench to tighten the lug nuts to the manufacturer’s specifications.
Common Issues and Troubleshooting Tips
Even with careful installation, issues can arise. Here are some common problems and how to address them:
1. Brake Noise
- If you hear grinding or squeaking noises, check for proper installation of brake shoes and ensure they’re not worn. Adjust or replace components as necessary.
2. Vibration When Braking
- Vibration may indicate uneven wear on the brake drum or improper alignment. Inspect and, if necessary, replace the drum or adjust the brake assembly.
3. Difficulty in Braking
- If the vehicle doesn't stop effectively, reassess the installation process. Ensure that all components are correctly aligned and functioning.
Maintenance Tips for Brake Drums
To prolong the life of your brake drums, regular maintenance is crucial:
1. Regular Inspections
- Check your brake system at regular intervals to identify any wear and address issues before they escalate.
2. Proper Cleaning
- Keep brake components clean to avoid dust and debris buildup, which can affect performance.
3. Monitor Brake Performance
- Pay attention to changes in braking efficiency. If you notice any decline, investigate the cause immediately.
Conclusion
In summary, the installation of rear axle brake drums is a fundamental skill for anyone involved in vehicle maintenance. By following the steps outlined in this comprehensive guide, you can ensure a safe and effective installation. Remember to prepare adequately, use the right tools, and perform regular maintenance checks to keep your braking system in top condition. Whether you are a seasoned mechanic or a DIY enthusiast, mastering this task is essential for maintaining vehicle safety and performance.
FAQs
1. How often should I replace my brake drums?
Brake drums should generally be replaced every 30,000 to 60,000 miles, but this can vary based on driving conditions and habits.
2. What are the signs of worn brake drums?
Signs include grinding noises, vibrations during braking, and reduced braking effectiveness.
3. Can I install brake drums myself?
Yes, with the right tools and following proper procedures, you can successfully install brake drums.
4. What tools do I need for brake drum installation?
Essential tools include a socket set, wrenches, screwdrivers, a brake spring tool, and a brake drum puller.
5. What should I do if my brake drum is stuck?
Use a brake drum puller to carefully remove it. If it's still stuck, check for corrosion or debris around the drum.
By adhering to the guidelines and insights presented in this article, you will not only enhance your mechanical skills but also ensure the safety and performance of your vehicle’s braking system.
PREVIOUS:

Contact
E-mail:
Phone
Add:
West of Dongwang Village, Gucheng Town, Longyao County, Xingtai City, Hebei Province


Focus On The R&D Of Brake Drums And Wheels